A couple of days ago, I was playing a game, and then I thought that I should record my gaming because I am a brilliant gamer. However, the main obstacle was that I did not know how to record screens on Windows 11 because I upgraded from Windows 10 to Windows 11. After doing research, I learned how to do it, so I used that method and recorded my screen easily. So I think that I should share these amazing methods with you on how you can start screen recording on your Windows 11 PC.
Recording screens on Windows 11 is not too hard; every user can easily record a screen on Windows 11 with audio if he or she gets good guidance. So don’t waste time, and let us start with how you can record screens on Windows 11.
Windows 11 has created two brilliant tools, the Xbox Game Bar and the Snipping Tool, to record screens along with audio.
“Unfortunately, you cannot record your File Explorer files or desktop files with the Xbox bar.”
“To do that, you will need another third-party app and PowerPoint.”.
How to record screen from XBOXGAMEBAR in Windows 11.
The Xbox game bar is already installed on your Windows 11 PC, so it is the easiest method to record the screen.
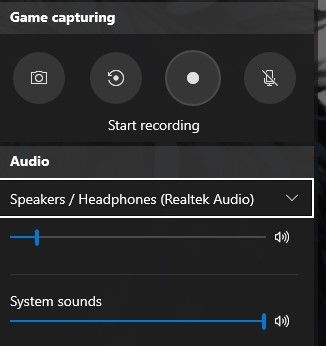
- Click Win+G on your keyboard
2. Select the third option. Start recording, and recording will be started automatically. For recording audio, enable the mic option on the fourth option.
3. If you are playing a game, you can enable background game recording from the settings.
4. When you are done Press ESC to close the recording. It will be saved on your C drive.
Some shortcut keys to record the screen easily in Windows 11:
* Open Game Bar: WIN+G
* Take a screenshot: WIN+ALT+PRTSCR
* Start/Stop Recording: WIN+ALT+R
* Record that: WIN+ALT+G
*Microphone/on/off: WIN+ALT+M
* Start/pause broadcast: WIN+ALT+B
* Show camera in broadcast: WIN+ALT+M
How to record the screen in Windows 11 through the Snipping tool?
The snipping tool is also already installed in Windows 11. You can use it to take screenshots and record screens.
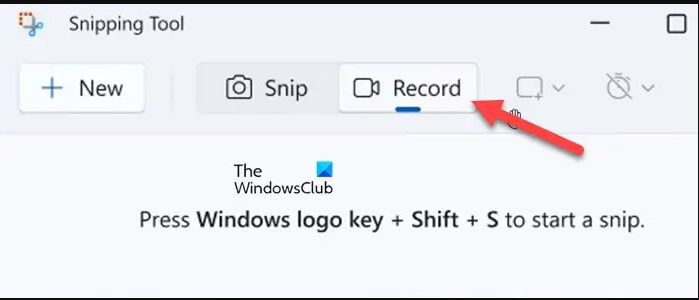
* To start this option, press WIN+SHIFT+S, and then you will see the snipping tool.
* Click on the Camcorder symbol.
* Click on “New” to start a recording.
* Crop the area that you want to record.
* The screen recording will start within 3 seconds.
How to record screen from the PowerPoint in windows 11.
Another method to record screens in Windows 11 is PowerPoint. But for this, you will need a PowerPoint 365 subscription.
- Open MS PowerPoint and create a blank page.
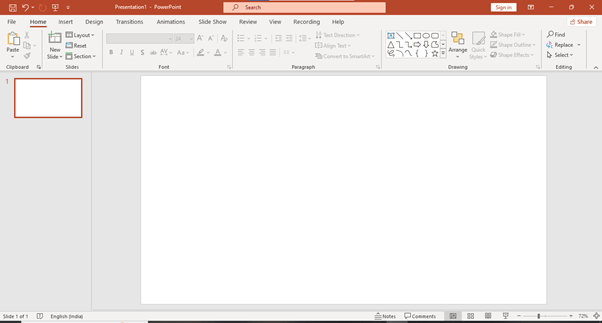
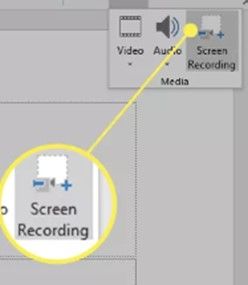
- Go to INSERT>MEDIA>SCREEN RECORDING.
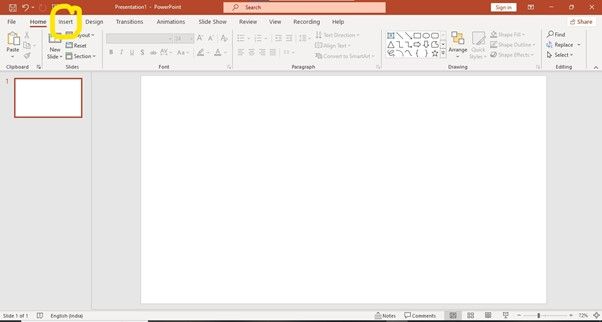
- A toolbar pops up on the screen.
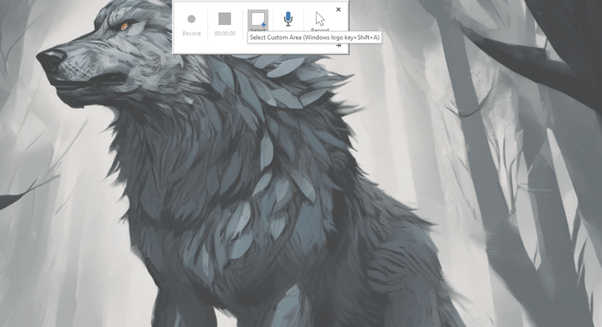
4. Click on the SCREEN CROP option, and the screen recording will start after 3 seconds. To stop screen recording, press WIN+SHIFT+Q.
5. Your recording will appear on the slide. Right-click the video and select Save.
So these are the simple ways to record screens in Windows 11.
There are some other third-party apps through which a user can record screens, such as Bandicam, Obstudio, and Camstudio.
Certainly, here’s a brief overview of how to record your screen using each software:
1. Bandicam: To record your screen with Bandicam, you just need to open the software and select the screen area you need to record. The function to select whether to record the entire screen or zoom into a specific area is also available. Then, press the “Record” key and commence the recording. Not only does Bandicam allow you to add your webcam to overlays, but it also allows for real-time drawing and allows you to schedule your recording anytime you deem appropriate.
2. OBS Studio: Using OBS Studio not only gives you the ability to record your screen, but its capabilities go far beyond that. To set your software up, you’d start by providing a source, which is the primary source like your screen, webcam, microphone, or maybe another media swipe. Next, configure your recording settings, including resolution, frame rate, and audio sources like a microphone or a video camera. Well, to wrap it up, hit the “Start Recording” button; this is what you should click to begin recording your screen. OBS Studio also provides you with nice features like scene transitions, filters, and plugins for more options in channel personalization.

3. CamStudio: To start, you will need to open CamStudio and pick a spot you want to record your screen. It offers controls for video and audio quality settings, which you can manipulate before the recording begins. Configure the settings as desired and click the “Record” button to begin recording whenever necessary. By using CamStudio, you can add notes and captions to your courses if you’re planning to use them in an instructional setting.

Conclusion
Recording screens on Windows 11 is made easy with built-in tools like the Xbox Game Bar, Snipping Tool, and PowerPoint. These tools provide intuitive solutions for capturing gameplay, creating tutorials, or making presentations. Additionally, third-party apps like Bandicam, OBS Studio, and CamStudio offer further flexibility for users with specific recording requirements. With these options available, users can easily share their experiences and knowledge with others.


1 thought on “How to Record Screen on Windows 11?”